Showing posts with label casebound. Show all posts

Sunday, January 18, 2009

Hooray! A tag!

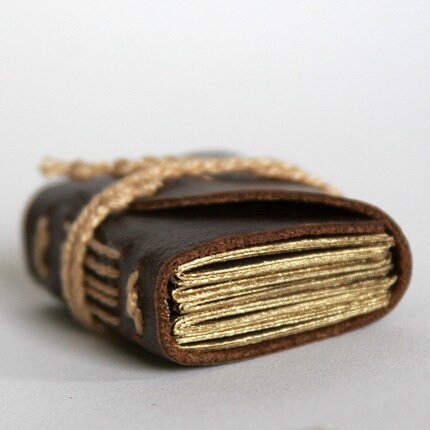
<--- (Lovely new mini! I'm practicing my case-binding. And I had this new chocolate linen. Yum.)

So... I love tag. Or I would if I was in better shape. Tag these days usually ends up with lots of shrieking and heavy breathing. And if I'm going to be shrieking and breathing heavily, I prefer horizontal activities. Owps. Too much info? Hahah... anyway! 

Kiley has tagged me! Alright, list 7 book facts about yourself and tag 7 people. Well, I don't think I have 7 people to tag at the end, but I'll see what I can do. 
So here goes. 

1. Apparently like Kiley, I'm terrible at keeping a journal, too! I have endless journals that I've started but never finished. I usually end up writing daily for a week or two, then being lazy and not writing for a month or so, then ripping out the pages I wrote when I finally come back to the journal. Meh, I just don't like my own writing! I know, terrible. 

2. My only bookshelf right now is a gorgeous white pine number that my father made for me. It has an overhang on the top shelf with a heart carved in it. I treasure it because he made it for me when I was about 10, and he carved that heart by hand. He always worked with hand tools and I love the unprofessional, handmade quality of it. Although the shelves are a little warped now, and it's overflowing with too many books, we refinished it last year with a satin clearcoat and now the wood gleams the way it did when he first gave it to me. He used such pretty dappled, knotted, wavy-grained wood. I wouldn't give it up for the world. 

3. Some of my very favorite books are stripper books. Candy Girl by Diablo Cody and especially Bare by Elisabeth Eaves are two standout titles. Lover Boy teases me about wanting to become a stripper, but really I don't. Their world just fascinates me. Plus, it seems that strippers who write memoirs tend to be smart, witty firecrackers and absolutely stellar writers. 

4. I absolutely despise book collectors who just buy up old books and put them in boxes or on shelves, never to be read again, who buy books just to HAVE them. I believe every book should be read until it falls apart, then repaired or rebound and read again. Those book collectors should be locked up in libary closets!

5. When I was much, much younger, I wrote stories. I still have tiny books I wrote in second, third, fourth grade (mom saved them ALL). I'd write on lined paper, scrap paper, receipts, notecards, anything, and fold it up, staple and make into a book. Little stories about dogs, spiders, little girls like me... I'm considering pulling a few out of storage and reproducing them for the Etsy shop. It would just be so fun to make big versions of them now. 

6. I never could get into using bookmarks. All my life I've just folded the corner of the book... awful for the book, but bookmarks always slide down and you lose them in the pages, or if they have string or dangly bits those get caught in something and yanked out of the book, or get in the way. I hear that Barbara at MoonBindery does the same... unite, page corner-turners! :)

7. I have a major addiction to pop-up books. I love the really fancy ones with pull-tabs, levers, doors, pop-ups and pop-outs and pop-downs. The whole book just comes alive. My mom has the same affliction, and I think it caught it from her. She has a fantastic pop-up book collection. 

Okay, I could go on talking about books forever. Like how much I LOVE when NPR does a story about books or interviews an author and you can hear the page turning over the radio. Nothing like the sound of a crisp page turning. Mmmm. 

Alright, I tag Sarah over at littlepaperbird, Kirstin at greentrikepress, Amy at NightJar Books, Dahlila at Snowflower Street (who doesn't make books but lots of wordy items, so perhaps she will participate?), um... Bibliophile! of course, and... can't think of any more that haven't already been tagged! That's five at least. 

And thanks for the tag, Kiley! 

Thursday, October 23, 2008

Fun Stuff.


I recently visited my old elementary school, and found a ceramic tile that was part of a school project. It's still there, mounted in the mural on the wall! How neat. It's funny how my young self portrayed my family members. My dad look sort of strong but stern, with those big yellow eyes, and my mom is almost ridiculously cheery and whimsical - big curls, big round eyes, flouncy dress. I don't know what the devil I'm wearing -flowers, stripes, blue, purple? I was kind of a fashion-confused child, so I guess it fits, hahaha.

I just put up a BUNCH of new items in both Eventual Invention and Pied Crow - and I already sold one of them! This little journal went home already:


And I finally put up those cairn pendants I mentioned a while back, like this one:


Clickables - they take you to the listing, where you can see more photos! Or you can check out all my new faux stone jewelry or the other new journal... :)

Hand-sewn Headbands!

Sounds intimidating? Not! They're really simple, once you get the hang of them. I had a really hard time finding instructions for these anywhere, so once I was able to piece together the technique I decided I had to put up a tutorial at some point. So the rest of you can see how I do it, at least. It's such a nice touch for casebound journals.

On to the tutorial!


Image Hosted by ImageShack.us

Things you will need for sewing headbands:
--Two colors of embroidery thread. Thinner thread will be more labor-intensive, but will give you a tighter, more elegant look, too. Thicker thread will probably be too bulky for a standard book. I use about an arms' length. Knot together at the end, and thread a needle onto the other end of each thread.
--Headband core. I usually use a narrow band of thick leather, but round cord works well, too.
--Book block, ready for casing-in.

If you have some sort of clamp or something to hold the book so its spine is at a 45 degree angle to your chest, use that. I just sit with my feet up and clamp the book block between my knees! Easy.


Click on the Read More link below for full instructions, with photos! :)


Image Hosted by ImageShack.us


Step one - use masking tape to secure your headband core along the upper edge of your book block. This picture actually shows the core a little farther away than it should be - it should sit right across the top corners of the pages. But don't worry about it too much - the sewing will pull it into the right place.


Image Hosted by ImageShack.us

Find the top sewing hole of your first signature and thread one needle through it. You might have to poke your needle through from the other side first so you can see where that hole is. Pull the thread through to the knot.


Image Hosted by ImageShack.us

Can you see how that thread goes? It's through the top binding hole, up along the inner spine of the first signature, behind the headband core, and forward across the top of the core.


Image Hosted by ImageShack.us

Here we go. Wrap the thread around the core once. You should be wrapping away from your body. I'm using Black and White, you might be using different colors, but for the sake of simplicity I'm going to say Black and White. Hold your Black thread taut with one hand, and thread the needle of White behind Black right where Black peeks out of the top of the signature.


Image Hosted by ImageShack.us

Now bring your White needle up behind itself. You can do this differently if you like - you're basically knotting the white thread around the black to secure it before you start the actual sewing of the headband.


Image Hosted by ImageShack.us

Once you have the White thread knotted there, thread the needle under the core and lay it over the top of the black thread, like this:


Image Hosted by ImageShack.us

Just hold everything there and take a good look at what you just did. This is important - if you don't start correctly, it won't work, and it's hard to take it all out. So check that everything is tight and secure.

Next!

I forgot to take a photo here, but fortunately this step is easy. Thread the needle back under the core, toward your body, and then wrap it around the core like this:

During that second bit, you will be looking at this:

Image Hosted by ImageShack.us

You can see that the black thread is pinned down to the core by what you just did with White, not just laying over the top.

So at this point, your White should come from its knot at the beginning, under the core and around the FRONT of that Black thread to pin it to the core, back under the core, over the core, under the core and over the core again.

Next!

Image Hosted by ImageShack.us

Now do it again - bring Black over White, and then thread the Black needle under the core toward your body. If you did that right, the Black thread should pin that white thread to the core, then go under the core, and hang down along the book spine. Then...


Image Hosted by ImageShack.us

Find the signature nearest your working point and stick the Black needle through the top sewing hole!


Image Hosted by ImageShack.us

Now thread that Black needle under the core again, so the Black thread wraps around the core.


Image Hosted by ImageShack.us

Pull the black thread taut along the top of the pages, and... can you guess? Bring the white thread over it, to the left, pinning it to the core. Then thread the White needle under the core towards your body. Then under the core again and over so it lays along the top of the pages.

Repeat this until you reach the end of the core:

Black thread to the left over White, thread needle under core, over core and through signature hole, up along the back of the spine and pull taut over the core.
White thread over Black, thread needle under core, over core, under core, over core, pull taut.

When you get to the end, it should look like this:


Image Hosted by ImageShack.us

And you can see that in the picture above, instead of threading the needle under the core, to the left, after I come out of the signature, I'm threading it under the core but to the right, between my last two stitches.

Once again, you can do this differently if you like - you're basically just knotting the black thread to secure it there, like this:

Image Hosted by ImageShack.us

See? I just make a loop and knot it here. I think it's simple and quite secure, but if you find it works better a different way, let me know. :)


Image Hosted by ImageShack.us

Then I bring the Black to the other side and knot it there, too.


Image Hosted by ImageShack.us

Do the same thing with the White, knotting on both sides, so it looks like this.

And when you spin the book around so the page edges face you, it should look like this, with a nice little bead on the edge:


Image Hosted by ImageShack.us

Ta-da! That's it! Very simple. I hope this has all been clear. Please feel free to ask questions in the comments! :)

Good luck!


Saturday, October 11, 2008

Recent Things

Well, it's been another busy week. But a good one. The fall is finally (finally!) here, in classic California style. The season changes between one evening and the next morning, and suddenly you're thinking about rain boots and scarves and pumpkin pie. I know I sure have been thinking about pumpkin pie. Mmmmm.

Anyway, some shop happenings. I listed this journal, which I made a few weeks ago but never got around to putting up. It's one of my favorites so far. Different lizard skins beneath vertical windows in the cover. Very textural. It was a real killer to make - those thin windows are so hard to cover properly! I had to slice the leather vertically over the windows, then super tiny little angled slices toward the corners. The lizard skins are glued to the back of the bookboard around the windows, then covered by the endpages, further securing them. I'm quite happy with the way it came out - though I did end up with a few small glue spots on the cover. Darn! 
But oh well. Each book is a learning experience! You can check out more photos in the Etsy listing


I also made a custom peapod pendant for Pat (TattooDreams), and that shipped out today. 

I had been jonesing to make some more pod jewelry lately, so I was happy to oblige Pat when she contacted me late last month. She wanted a simple little pod of spiced clay with two green beads. I didn't have any on hand, but after a little shopping I located this lovely pair of green speckled stone. Add a little brass jump ring a ta-da! Peapod. I think it's very cute. On a nice brass chain, it will be so adorable. I hope she enjoys it. I might just make myself a similar one. 


So making my first custom order was very fun indeed. And here are some other things I made while I was noodling around with clay. 

Image Hosted by ImageShack.us

There are some pods there, a couple little mushrooms, flowers and other doodads that I'm not sure what to do with yet, and some faux stone cairn pendants-to-be. 
I have been meaning to post up some photos of my business cards and the custom stamp I ordered from terbearco. Here we are: 

Image Hosted by ImageShack.us

See, it's very well made, with a handy place to put a label for your stamp, and as you can see below, it prints quite well, too! 

Image Hosted by ImageShack.us

And here are my business cards, from greenerprinter.com. They came out so nicely. Very simple. That's how I wanted them - too much junk or fancy images and the business information is lost. Name, phone, shop address, email - why do I need more than that?

Image Hosted by ImageShack.us

They even have this nice recycled content label on the back. It's optional - you can get cards without it, but I'm all for recycling and especially post-consumer content, so I left it on. 

Image Hosted by ImageShack.us

All in all, a good week! 

Thursday, September 4, 2008

Progress, finally!

Well, I finally got all the unfinished books finished, put a few disconnected ideas together into books, and got everything photographed. It took me all day, but it's done! :) And anyway, a day spent bookmaking and Etsying is a pretty awesome day. 

This is what my desk looked like this morning: 


Image Hosted by ImageShack.us

And here is one of the results:
 Image Hosted by ImageShack.us

It's so bright! I've been working with black so often that I wanted to do something fiercely bright. I wanted to do a little stenciling, and I wanted to use rich, deep colors. I also wanted to try using colored signature reinforcements. It came out so well, I'm definitely going to make more of this kind of journal. I had really missed using cotton fabric. It's so much easier to work with than leather. I'm particularly happy with this journal because I was able to avoid glue smudges anywhere. I am continually plagued by glue smudges.

Here are a couple other recent listings:

A black leather casebound with gold. This one has hand-sewn headbands, which I'm going to do a tutorial on soon. They're really satisfying to make. It's a really nice touch on any journal.

Image Hosted by ImageShack.us

My little lizard minis, which you saw a few days ago:

Image Hosted by ImageShack.us

Image Hosted by ImageShack.us


A square coptic lizard skin mini:

Image Hosted by ImageShack.us

Black leather coptic with lizard skin under windows. The windows were so hard to get right - the flaps of leather that curl to the inside are so small and hard to glue down. But it did come out nicely.

Image Hosted by ImageShack.us


So there's what I've been so busy with lately. I have one more to list, but that can wait until tomorrow. As Lilli Von Schtupp might say, let's face it - I'm tired! :)

Friday, August 29, 2008

Adventures in case binding.

AUGHHH. What a frustrating morning.

Here's the problem. I can do coptic binding all day long, I can longstitch like crazy, but case binding... I always have issues with case binding. I can never figure out how to structure the spine. When I have my cover boards cut, and I have the hard spine piece cut, I always have problems deciding how to glue them to the card that makes up the spine hinge. So I don't have the right amount or shape of space for the book block. Then when I glue the book block into the case, I end up with a book that either won't fully close, or won't open all the way. It's a real bummer to have a beautiful book put together, with leather covers and hand-sewn headbands, sanded paper edges and snakeskin leather quarter binding - to then have the whole book be a throw-away. Curses! So frustrating.

I never have these issues when I don't use that third piece of bookboard for the hard spine. And I can't seem to get the right French groove going when I use a hard spine piece. I'll have to post up some photos so you all might be able to help me figure out what I'm doing wrong.

Friday, August 22, 2008

New projects, new materials. Very exciting!
I put up a lizard-skin journal in the Etsy shop the other day, and although it hasn't received too many views or any hearts for that matter, I'm just so excited about working with reptile skin. I just got a new pack in the mail. :D They're all by-product scraps, but many have really gorgeous patterning and I can't wait to make more journals with them.

First, however, I have two hardbound projects in linen to finish. One field journal with an integrated linen-covered box around it, and these tiny little triplets: Only two by two inches. Very cute. I have this idea to make a box for them, perhaps with an envelope-style closure like my green moss journal in the last post. I haven't thought of the right box for them yet. Hmm.


Image Hosted by ImageShack.us