Friday, October 31, 2008

This is how I feel this morning...


It's an old photo, from two years ago in the old house. But I do like it. I miss that west-facing bathroom window. In the afternoon it would carve a canyon of light into the bedroom. It was so nice, all that warmth reflecting off the white bathroom tile.

But now we have many more windows. Out which I see some clouds today! Yep, check that out - we might even get a little rain.


I'm thrilled - we need the rain so much. On our trip to the Eastern Sierras, it absolutely poured. I couldn't have been happier. A little wetness wouldn't hurt Simi Valley, either. Rain is so infrequent it makes me want to take out the mountain bikes and go play in the mud.

Aw, and there's the sun peeking out.  Curses. 

We carved pumpkins last night with our good friends Shauna and Jeremy, and their tiny new person Kira. Very cute, but my favorite thing about her is that she isn't mine. I get to wave goodbye to her little blue eyes at the end of the night. Joe and I have a strict No Babies Policy. I love other people's babies, but I don't want any of my own.

I'll post some pumpkin pictures later tonight or tomorrow. 

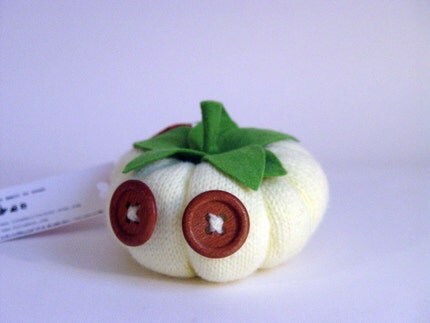
For now, this little guy is my very favorite Etsy pumpkin. 


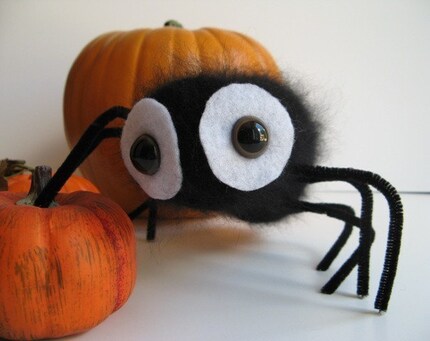
And of course, my favorite Etsy Halloween card.


I guess it's those big eyeballs that get me. :)

So four days until the election, everyone. Who's excited (and terrified)? ME!

Thursday, October 30, 2008

Products of the Belgian Binding Blitz

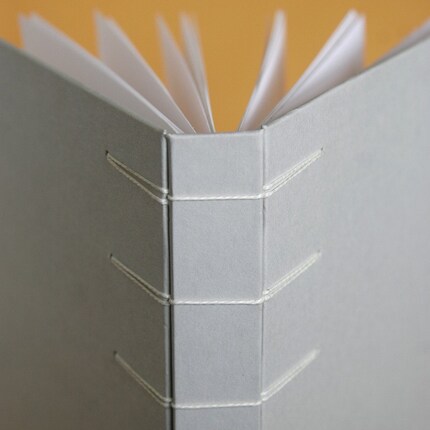
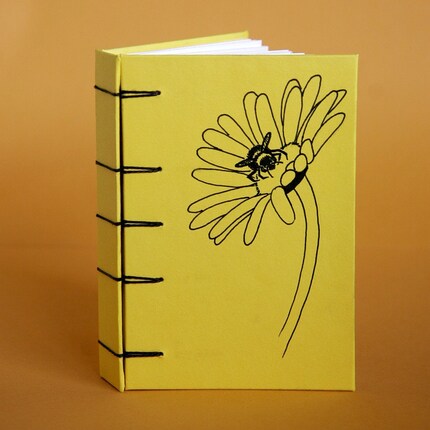
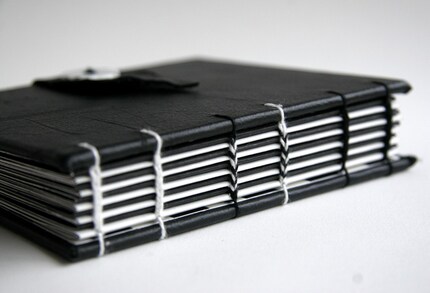
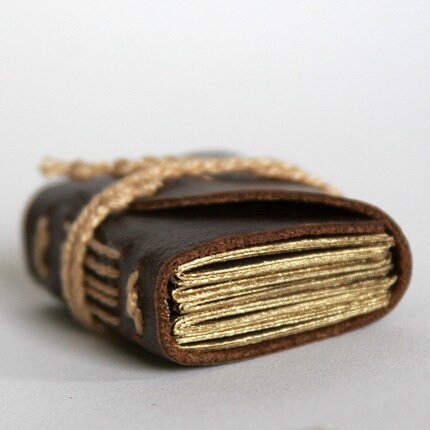
I'm on a Secret Belgian Binding tear right now - here are two of the products. :)


Hooray! Time to make more...

Wednesday, October 29, 2008

New Favorites!

Two new favorites, in fact. One is secret Belgian binding, which I tried for the very first time last night and absolutely fell in love. I bound it a bit differently than the instructions, which was much more tedious, but nevertheless I just adore it. 

The second new favorite is Darjeeling tea - I was perusing the shelves of the Coffee Bean & Tea Leaf the other day, since I was out of loose leaf Chai (theirs is by far the best mix anywhere, with whole spices and whole leaf black tea - yummmm). They had Estate Darjeeling in those lovely triangle bags, so I thought I would give it a try. I've only had that horrible commercial powdered Darjeeling before. 
When I first tried Chai, I wasn't so hot about it but after going to the CB&TL headquarters right over the hill in Camarillo and drinking some with their tea master, David, I couldn't get enough of it. I was shooting photos for an Acorn article and to this day I am so glad that I was the one my editor chose to shoot that assignment. David is a real tea connoisseur and his passion for good tea really impressed me. The samples of loose leaf tea that he gave me hooked me forever. 
Anyway, so after my rather transformative experience with CB&TL Chai, I figured their Darjeeling would likely be something remarkable as well. And I was right! It's the sort of tea that seems to curl up around your tongue - spicy and full, with that golden flavor characteristic of black teas. 

Ah tea. What would I do without you?

Another neat thing - I bought a nice big one pound block of beeswax on Etsy and it arrived, so I'm going to try another secret Belgian book tonight with waxed thread. :)

Sunday, October 26, 2008

In and Out

Out went this journal, finally... I was so excited that someone finally bought it, but in a way I am so sad to see it go. It was only my second try at a two-needle coptic, and the only one I've ever sold. It's been in my shop quite a while now, and while it got tons of hearts, nobody seemed to like it enough to take it home. Sad... it was so much fun to make, so graphic and really cool. But it finally found a new home - in Canada! Very awesome. 


And.....

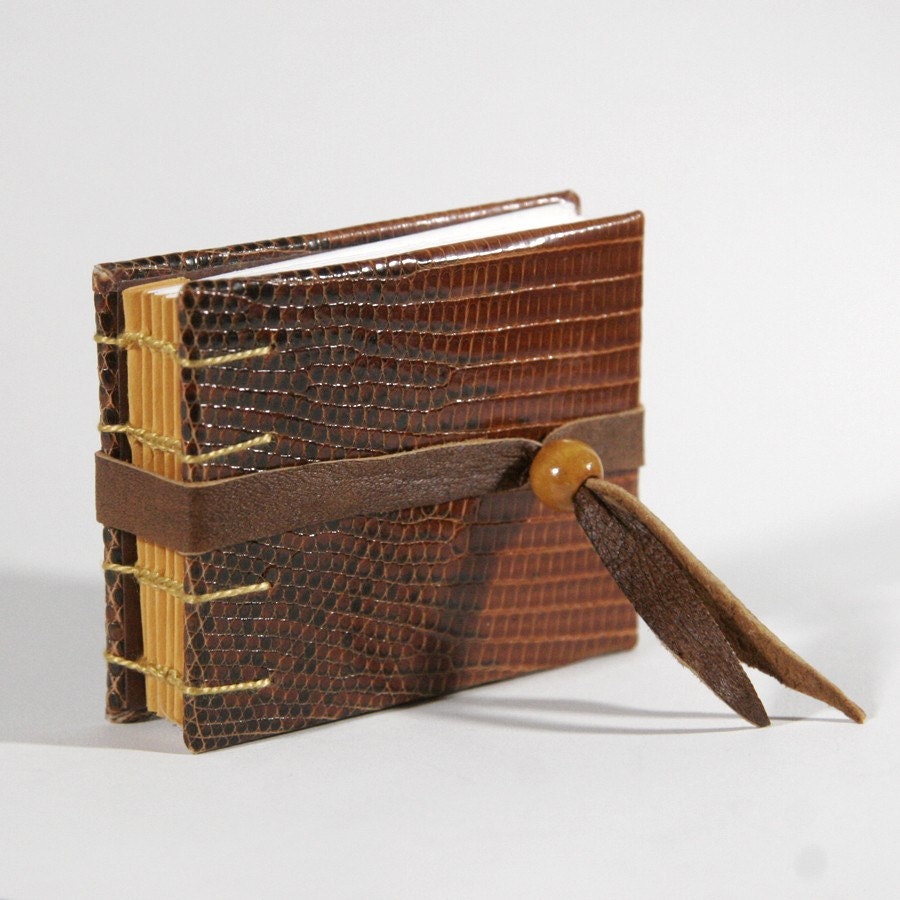
Into the shop went this journal! I didn't think I would have any time this weekend to make journals, but I was having such a craving to create... and I had this lovely squash-colored cardstock. It went so well with a lizard skin piece that I had been saving for so long. I just love the texture of this piece of leather - the scales start out black, round, and small, near the spine of the journal, and progress to large, wide and brown near the opposite edge. 
The wooden bead matched the spine protectors nicely and so it all just came together. I had just enough paper left over from the last journal I made, Grey Winter, so I used that. A little pocket-sized autumn number. I almost want to keep it, I just love the color and texture of the skin. 

So good stuff! And... coming soon, I have cyanotype fabric that I've been playing with lately, and I have two covers that are needing journal guts to complete them. So soon I will have some cyanotype-cover journals for you to see! Hooray! :D


And I recruited my kitty Maximus to have a look at the Etsy shops. He wanted to know if anyone sold organic handmade kitty food on Etsy. Sheesh, it's all he thinks about. 
I think I will get him a spiked leather collar for Xmas. We went for a walk and he hissed at the Scary Black Birds. Then he hissed at the Mean Neighbor. Then he hissed at the Evil (teacup) Maltese Puppy. Then he hissed at the Terrible Garbage Cans.
He seriously needs to relax.

Anyway, that's all for now!

Thursday, October 23, 2008

Fun Stuff.


I recently visited my old elementary school, and found a ceramic tile that was part of a school project. It's still there, mounted in the mural on the wall! How neat. It's funny how my young self portrayed my family members. My dad look sort of strong but stern, with those big yellow eyes, and my mom is almost ridiculously cheery and whimsical - big curls, big round eyes, flouncy dress. I don't know what the devil I'm wearing -flowers, stripes, blue, purple? I was kind of a fashion-confused child, so I guess it fits, hahaha.

I just put up a BUNCH of new items in both Eventual Invention and Pied Crow - and I already sold one of them! This little journal went home already:


And I finally put up those cairn pendants I mentioned a while back, like this one:


Clickables - they take you to the listing, where you can see more photos! Or you can check out all my new faux stone jewelry or the other new journal... :)

Hand-sewn Headbands!

Sounds intimidating? Not! They're really simple, once you get the hang of them. I had a really hard time finding instructions for these anywhere, so once I was able to piece together the technique I decided I had to put up a tutorial at some point. So the rest of you can see how I do it, at least. It's such a nice touch for casebound journals.

On to the tutorial!


Image Hosted by ImageShack.us

Things you will need for sewing headbands:
--Two colors of embroidery thread. Thinner thread will be more labor-intensive, but will give you a tighter, more elegant look, too. Thicker thread will probably be too bulky for a standard book. I use about an arms' length. Knot together at the end, and thread a needle onto the other end of each thread.
--Headband core. I usually use a narrow band of thick leather, but round cord works well, too.
--Book block, ready for casing-in.

If you have some sort of clamp or something to hold the book so its spine is at a 45 degree angle to your chest, use that. I just sit with my feet up and clamp the book block between my knees! Easy.


Click on the Read More link below for full instructions, with photos! :)


Image Hosted by ImageShack.us


Step one - use masking tape to secure your headband core along the upper edge of your book block. This picture actually shows the core a little farther away than it should be - it should sit right across the top corners of the pages. But don't worry about it too much - the sewing will pull it into the right place.


Image Hosted by ImageShack.us

Find the top sewing hole of your first signature and thread one needle through it. You might have to poke your needle through from the other side first so you can see where that hole is. Pull the thread through to the knot.


Image Hosted by ImageShack.us

Can you see how that thread goes? It's through the top binding hole, up along the inner spine of the first signature, behind the headband core, and forward across the top of the core.


Image Hosted by ImageShack.us

Here we go. Wrap the thread around the core once. You should be wrapping away from your body. I'm using Black and White, you might be using different colors, but for the sake of simplicity I'm going to say Black and White. Hold your Black thread taut with one hand, and thread the needle of White behind Black right where Black peeks out of the top of the signature.


Image Hosted by ImageShack.us

Now bring your White needle up behind itself. You can do this differently if you like - you're basically knotting the white thread around the black to secure it before you start the actual sewing of the headband.


Image Hosted by ImageShack.us

Once you have the White thread knotted there, thread the needle under the core and lay it over the top of the black thread, like this:


Image Hosted by ImageShack.us

Just hold everything there and take a good look at what you just did. This is important - if you don't start correctly, it won't work, and it's hard to take it all out. So check that everything is tight and secure.

Next!

I forgot to take a photo here, but fortunately this step is easy. Thread the needle back under the core, toward your body, and then wrap it around the core like this:

During that second bit, you will be looking at this:

Image Hosted by ImageShack.us

You can see that the black thread is pinned down to the core by what you just did with White, not just laying over the top.

So at this point, your White should come from its knot at the beginning, under the core and around the FRONT of that Black thread to pin it to the core, back under the core, over the core, under the core and over the core again.

Next!

Image Hosted by ImageShack.us

Now do it again - bring Black over White, and then thread the Black needle under the core toward your body. If you did that right, the Black thread should pin that white thread to the core, then go under the core, and hang down along the book spine. Then...


Image Hosted by ImageShack.us

Find the signature nearest your working point and stick the Black needle through the top sewing hole!


Image Hosted by ImageShack.us

Now thread that Black needle under the core again, so the Black thread wraps around the core.


Image Hosted by ImageShack.us

Pull the black thread taut along the top of the pages, and... can you guess? Bring the white thread over it, to the left, pinning it to the core. Then thread the White needle under the core towards your body. Then under the core again and over so it lays along the top of the pages.

Repeat this until you reach the end of the core:

Black thread to the left over White, thread needle under core, over core and through signature hole, up along the back of the spine and pull taut over the core.
White thread over Black, thread needle under core, over core, under core, over core, pull taut.

When you get to the end, it should look like this:


Image Hosted by ImageShack.us

And you can see that in the picture above, instead of threading the needle under the core, to the left, after I come out of the signature, I'm threading it under the core but to the right, between my last two stitches.

Once again, you can do this differently if you like - you're basically just knotting the black thread to secure it there, like this:

Image Hosted by ImageShack.us

See? I just make a loop and knot it here. I think it's simple and quite secure, but if you find it works better a different way, let me know. :)


Image Hosted by ImageShack.us

Then I bring the Black to the other side and knot it there, too.


Image Hosted by ImageShack.us

Do the same thing with the White, knotting on both sides, so it looks like this.

And when you spin the book around so the page edges face you, it should look like this, with a nice little bead on the edge:


Image Hosted by ImageShack.us

Ta-da! That's it! Very simple. I hope this has all been clear. Please feel free to ask questions in the comments! :)

Good luck!


Thursday, October 16, 2008

Lots of Things to Post About....

 But little time. I just wanted to note that you can see I changed my tag cloud over on the right hand side from a ZoomClouds thing to a simple, html-based cloud. ZoomClouds didn't use my actual entry tags, only the entry text itself, and the links directed to a page filled with ads. All the relevant entries from my blog were down at the bottom of the page, below ads for other bookbinders! Sucky. So I did a bit of googling and found a better solution. 

You can find simple, easy instructions here: 
Compender: A Simple Blogger Tag Cloud Widget

It's the only one that I've found that is so fabulously simple to use. It took me all of about 15 minutes to get it installed and all the variables adjusted to my liking. 

Definitely read the comments - skim over to the ones that mention adjustments to the html. They tell you how to change the number of times a tag shows up, the font size, etc. I made a couple of adjustments myself to color and text alignment, so feel free to ask if you'd like to know.  :)

Sweetness.  

Tuesday, October 14, 2008

Wildfire Season...

Is here, right on time. Hello, fall! Hello, wildfires!

So here's the situation.


Hopefully that comment that "fire is moving to the southwest" is just an exaggeration. Because if that giant fire moves to the southwest, my house will be burning. Oh. Boy.

Smoots!

Some of you more observant blog readers may have noticed the new gadget at the bottom of the column on the right. Now you can measure in Smoots! How cool is that. Just type any measurement - such as 50 feet, 6 inches, 20 yards, etc - into the box and hit the Measure button!

I meant to do this sooner, since October 4 (my birthday, coincidentally!) is Smoot Celebration Day, but I'm just now getting around to it.

So go ahead, try measuring the distance to your grandmother's house, or the length of your living room, or even your own height! Whenever I hit the search button, I always think of Oliver Smoot getting up, lying down, getting up, lying down, getting up, lying down....

For more about Oliver Smoot, and the Smoot measurement, check out the links below the search box. :)

Monday, October 13, 2008

Holiday Fairs

Whew. 

I just finished two hours of searching for local holiday craft fairs, with little to show for it. I emailed one person about an early November show, and there's a show here in my city in 2 weeks, but that's so soon! I'm worried I won't be ready. And they might be full already! 
There's so much information that it's really overwhelming. I mean, I'm not set up as a real business yet - so sales tax is a mystery, and what the devil is a California Seller's Certificate? They mention these things as if everyone will know about them. I'm so new to this! 
I might just have to wait until next year. 

Damn, it's so frustrating! 


Edit: At least I am looking into ordering some big boxes of paper for journal insides. I'm so tired of buying Strathmore drawing pads and cutting them up, then ending up with drawing pad bits that I'm unwilling to toss but unsure about what to make of them. So I went to the Paper Mill Store and found great prices. I ordered some sample packs, because it is oh-so-important for me to touch the paper and see how it takes ink and paint before buying it in bulk. 

Saturday, October 11, 2008

Recent Things

Well, it's been another busy week. But a good one. The fall is finally (finally!) here, in classic California style. The season changes between one evening and the next morning, and suddenly you're thinking about rain boots and scarves and pumpkin pie. I know I sure have been thinking about pumpkin pie. Mmmmm.

Anyway, some shop happenings. I listed this journal, which I made a few weeks ago but never got around to putting up. It's one of my favorites so far. Different lizard skins beneath vertical windows in the cover. Very textural. It was a real killer to make - those thin windows are so hard to cover properly! I had to slice the leather vertically over the windows, then super tiny little angled slices toward the corners. The lizard skins are glued to the back of the bookboard around the windows, then covered by the endpages, further securing them. I'm quite happy with the way it came out - though I did end up with a few small glue spots on the cover. Darn! 
But oh well. Each book is a learning experience! You can check out more photos in the Etsy listing


I also made a custom peapod pendant for Pat (TattooDreams), and that shipped out today. 

I had been jonesing to make some more pod jewelry lately, so I was happy to oblige Pat when she contacted me late last month. She wanted a simple little pod of spiced clay with two green beads. I didn't have any on hand, but after a little shopping I located this lovely pair of green speckled stone. Add a little brass jump ring a ta-da! Peapod. I think it's very cute. On a nice brass chain, it will be so adorable. I hope she enjoys it. I might just make myself a similar one. 


So making my first custom order was very fun indeed. And here are some other things I made while I was noodling around with clay. 

Image Hosted by ImageShack.us

There are some pods there, a couple little mushrooms, flowers and other doodads that I'm not sure what to do with yet, and some faux stone cairn pendants-to-be. 
I have been meaning to post up some photos of my business cards and the custom stamp I ordered from terbearco. Here we are: 

Image Hosted by ImageShack.us

See, it's very well made, with a handy place to put a label for your stamp, and as you can see below, it prints quite well, too! 

Image Hosted by ImageShack.us

And here are my business cards, from greenerprinter.com. They came out so nicely. Very simple. That's how I wanted them - too much junk or fancy images and the business information is lost. Name, phone, shop address, email - why do I need more than that?

Image Hosted by ImageShack.us

They even have this nice recycled content label on the back. It's optional - you can get cards without it, but I'm all for recycling and especially post-consumer content, so I left it on. 

Image Hosted by ImageShack.us

All in all, a good week! 

Tuesday, October 7, 2008

Shipping and Packaging for the Holidays

Well, I'm starting to gather all my packaging supplies together for the holidays - since I have already started shopping, I figure others have too and I should be ready. I'm considering adding gift wrap to the shop, but I'm not sure how that will work. I can make the inside of the package pretty, but USPS and UPS stick labels and stickers and such all over the outside, so how can I pretty that up? Hmm.....
I still need to buy some plain brown boxes. I'm going with the natural, organic palette for packaging. I think it's classy. :)

I received this message in an email from Karen Allen, e-Consignment representative of Florence LLC, when I bought something from them on Ebay. I thought it was really funny and charming.

We do our best to hold true to a time tested shipping tradition passed down for over 5000 years :). This very intensive practice is only achieved after years of training, meditation, and deep breathing but mostly by holding our mouth just right while we concentrate. We donned special gloves and placed it into a fancy box made of magic, lined with KuKu bird feathers, tied the box with a few strands of Unicorn hair, and wrapped the whole thing in a sparkly looking faux gold leaf paper, with elm leaf inlay from Wal-Mart. Unfortunately, by the time it gets to you, that fancy stuff will most likely have been picked clean by the curious package handlers along the way. Please do not be surprised to see a plain package with your purchase inside :)

Sunday, October 5, 2008

Autumn Seed Pods

<-- Sweet little split seed pod!  

It's one of a bunch of seed pod jewelry that I recently sold over at Eventual Invention. I even received a custom order for another pendant! It's very exciting. This line of jewelry is my very first and I had so much fun making it. It's exactly what I had in my head - organic, with a subtle palette and using natural materials with brass accents.

The creation process was really quite accidental - I explain it in the item listings in Eventual Invention, too - I was looking for some speckled clay, and I couldn't find anything in stores that matched what was in my head. So on a whim I pulled some freshly ground spices from my spice cabinet and rolled them into plain white clay, since that was what I had on hand. I figured if it works for pies it will work for jewelry! And I'm so glad. The clay smells like autumn and pumpkin pie and cinnamon and chai tea. Ohhhh it's just spectacular. The pods I already made used tigers eye stone and brown and tan wood beads for the seeds. Very autumnal in color. I made them during the summer, but I was already longing for fall. Can you tell?

So I will be making a new little pod pendant soon! I'm rather excited. :D

Saturday, October 4, 2008

Today It Is My Birthday

Hooray! I have lots of photos to post - of the new stamp and business cards I bought for the shop recently, two or three from our recent vacation (i shot almost exclusively pinholes on Fuji 160, so those will have to wait for a while), and miscellaneous others too. I'll get them up soon. I thought I wouldn't have much to do after I returned from vacation, but boy was I wrong. So much to get done....
Too bad I have to work today, but least the weather is delightfully stormy. Finally feels like fall! I do love October, and not just because there is chocolate cake involved. :D

To celebrate, here are a few fun birthday goodies from Etsy. Pictures are clickable and take you to the Etsy listing. 


A simple and just downright cool card from tracychong, $4. 

Image Hosted by ImageShack.us


Two cute candles from Candle Confections, $8.99. Nice touch with the sprinkles!

Image Hosted by ImageShack.us

A squishable and snuggly slice of birthday cake from crazydaisy60, $21.95. I wonder if they come in chocolate....

Image Hosted by ImageShack.us


The most adorable birthday hat, EVER! From CrashCanStudio, $17. I totally want one!!

Image Hosted by ImageShack.us


A very cool card-alternative, with a candle, matches, and even a built-in candle holder. From dippylulu, $11.50 for a set of three. :)

Image Hosted by ImageShack.us

A birthday card with an awful lot of work put into it. This is the ultimate in handmade cards! $4, from AJK Artistry. 

Image Hosted by ImageShack.us

And finally, an adorable little wooden cake or cupcake-topper from kiwihandmade, $15. Too cute. 

Image Hosted by ImageShack.us

Happy birthday to me! :D